Lesson 2 – Adding character and a voice
Welcome
Hello, and welcome to Lesson 2! Let’s get started. One of the great strengths of Nawmal is having different characters interact with one another in a scene. In this lesson, you are going to learn how to:
- add a character to your scene
- add dialog for this new character
- change (or “recast”) a character
- replace Nawmal’s text-to-speech voice with recorded human voiceover
Dialog is only one way for characters – real or animated -- to communicate. And this is where Nawmal really shines.
So in this lesson, you’re also going to learn three ways you can create non-verbal communication:
- Facial expression – like smiling and frowning
- Posture – standing, sitting, hands on one or both hips, etc.
- Gestures – such as crossing arms, pointing a finger, nodding…we even have “rock on” and “peace out” (because we like to have fun, too)

By the end of this lesson, we think you’ll have a short movie you’ll want to show off. So we will teach you how easy it is to export your scene as a video in one of several common formats (MP4, etc.) – easy-peasy.
First, open the Nawmal project file you saved in Lesson 1, or you can download and use the project file that we made in the last lesson if you prefer – just click here, open the file, and follow along.
If you recall from the last lesson, we changed the camera angle so that we could see our characters better. Well, if we want our scene to open with that closer angle, we need to apply it in the story line. And while we will be going over cameras in greater detail later, we will get a little “head start” now, only to make it easier to see.
Select Views>Cameras, or you can click Cameras on the middle toolbar.

Now hover your mouse over Camera 2. When your cursor turns into a “hand,” click and drag that camera to the beginning of the first line of dialog.

Add a Character
Now, let’s add someone to interact with Carl on the set.
At the bottom of the screen, notice the two buttons: Story and Characters. These let you toggle between casting the scene and writing the dialog.

Click Characters. The Characters fill the bottom pane – as you saw in Lesson 1. In the Suits collection, install and drag Alison to the scene. Remember the blue target circle – and drop her somewhere next to the desk.

Now go back to the bottom of the screen, and click Story.
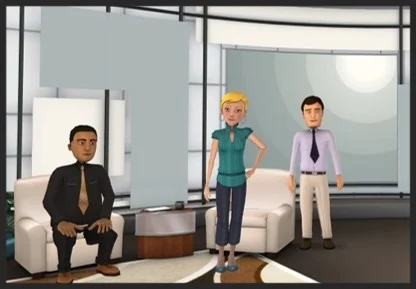
In keeping with the TV Set theme, it is realistic for the two characters to be behind the desk in the opening scene. So use the Move tool to place Alison to stand beside Carl.
A little hint: It can be a little frustrating to move a character to stand behind a prop on the set. Use the Orbit tool to change your perspective so that you are looking down on the set. Then use the Move tool to place Allison.

You can click Camera 2 to return to the original position.
As soon as you added Allison to the scene, Nawmal adds her character to the Cast pane.
In the Cast pane, click on Allison’s thumbnail picture – this will change the Character Position Widget to reflect her positioning.
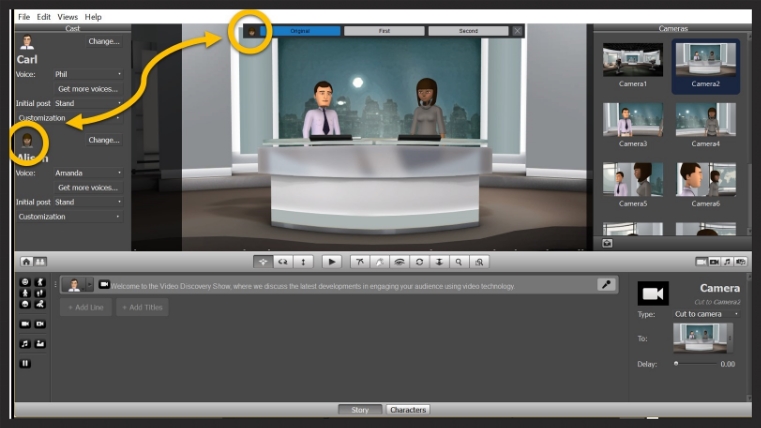
On the widget, click Second. This just puts her in a better position opposite Carl.
Add a Voice for Allison
Like we did in the last lesson, let’s choose a voice for Allison. Under her name in the Cast pane, click the picklist next to Voice.

Note: If you don’t see the Amanda voice in the picklist, that means you don’t have it installed. Similar to Carl, you can click the More Voices button, and then install and select a voice from the options that appear. The Amanda voice should then appear in the Voice dropdown list, where you can select it.
Add Dialog
Now let’s get these two talking!
If we continue with the premise that Carl and Allison are newscasters, then they will, at first, be talking to the viewer.
At the bottom of the screen, click Story. Then, under the box where we wrote Carl’s dialog, click Add Line. Notice that Nawmal assumes that the next line will go to Allison – you can change the character by clicking the thumbnail picture and choosing another character. But let’s leave it the way it is for this lesson.
In that box, write (or cut and paste) the following:
That’s right, Carl – and tonight’s guest will not disappoint those of you who have written in and called our show, asking to hear more.

Add Gestures
Facial Expression and Looking at the Camera
Go ahead and click Play. Carl and Allison will automatically perform their dialogue, but there are a few things you can do to improve, or direct, their performance, including replacing their voices with recorded real voices. We will cover that in a later lesson, but for now let’s work on their physical performance
By default, the characters look at whoever is speaking; but in this case, you want Carl to look at the camera…to address his audience.
So, go to Carl’s first line, and click to position your cursor at the beginning of the line. Then click Look at Camera on the left.
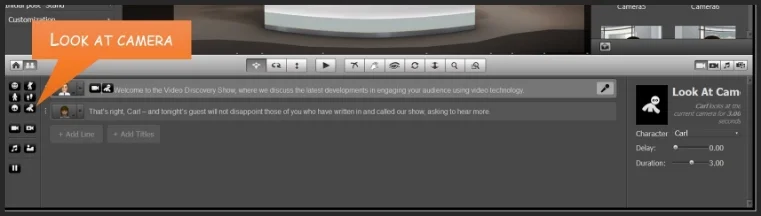
Note: When you’re in Story mode – like we are now with the dialog showing – think of anything that appears on the right pane as something that directly affects the character or dialog line you’re editing. You’ll see this pattern as we go along. Don’t worry…I’ll remind you.
Back to the gestures.
In the Look at Camera pane, make sure Carl is selected in the Character picklist, and leave the other selections as the defaults.
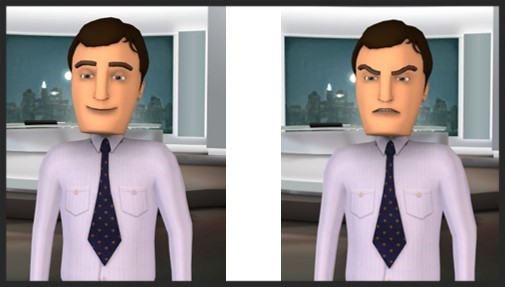
Now click Facial Expression on the left. Notice that the Facial Expression pane appears on the right.

In the Facial Expression pane, again, make sure Carl is selected in the Character picklist. Now in the Expression picklist, select Joy. Leave the Delay, Duration, and Strength settings as default.
Now click Play. Notice that Carl looks at the camera, and then turns to look at Allison – very natural. But Allison looks at Carl the entire time. So let’s fix that.
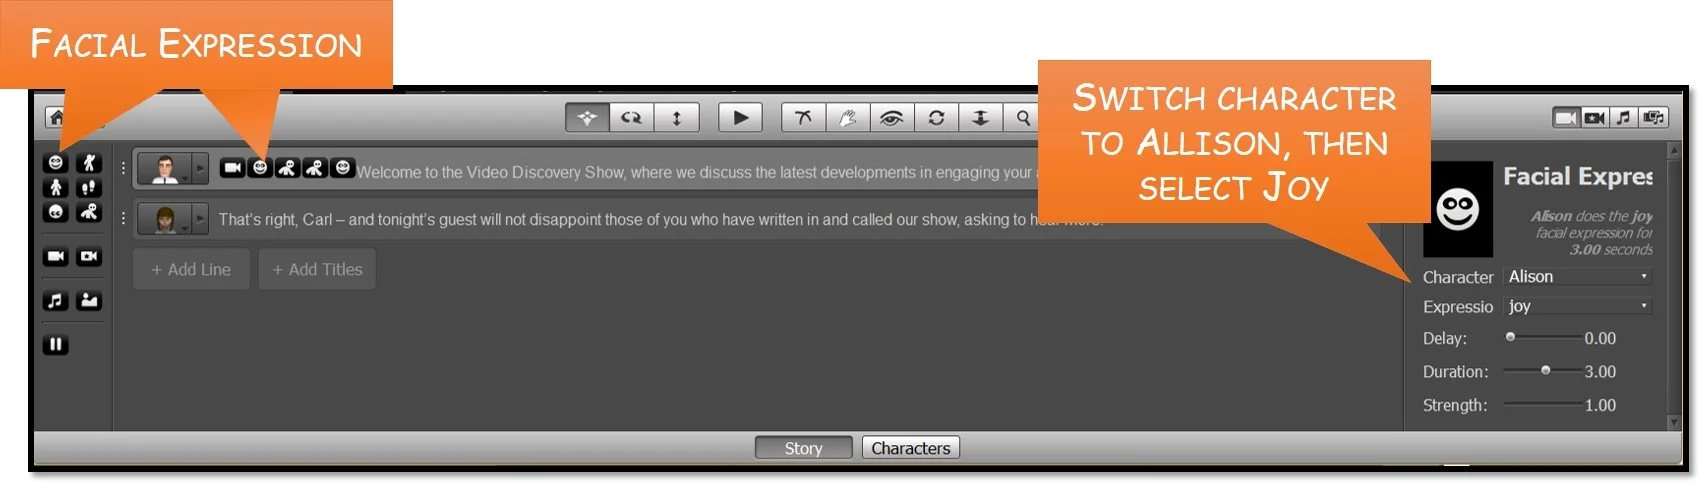
Again put the cursor at the beginning of Carl’s dialog, just like you did for Carl, except this time, we will be selecting Allison as the target.
Click Look at Camera, then in the Look at Camera pane, change the Character picklist to Allison (she should appear as an option).
Now click Facial Expression, change the Character to Allison, and select Joy from the Expression picklist.
Click Play again…almost there.
Let’s refine Allison’s acting.
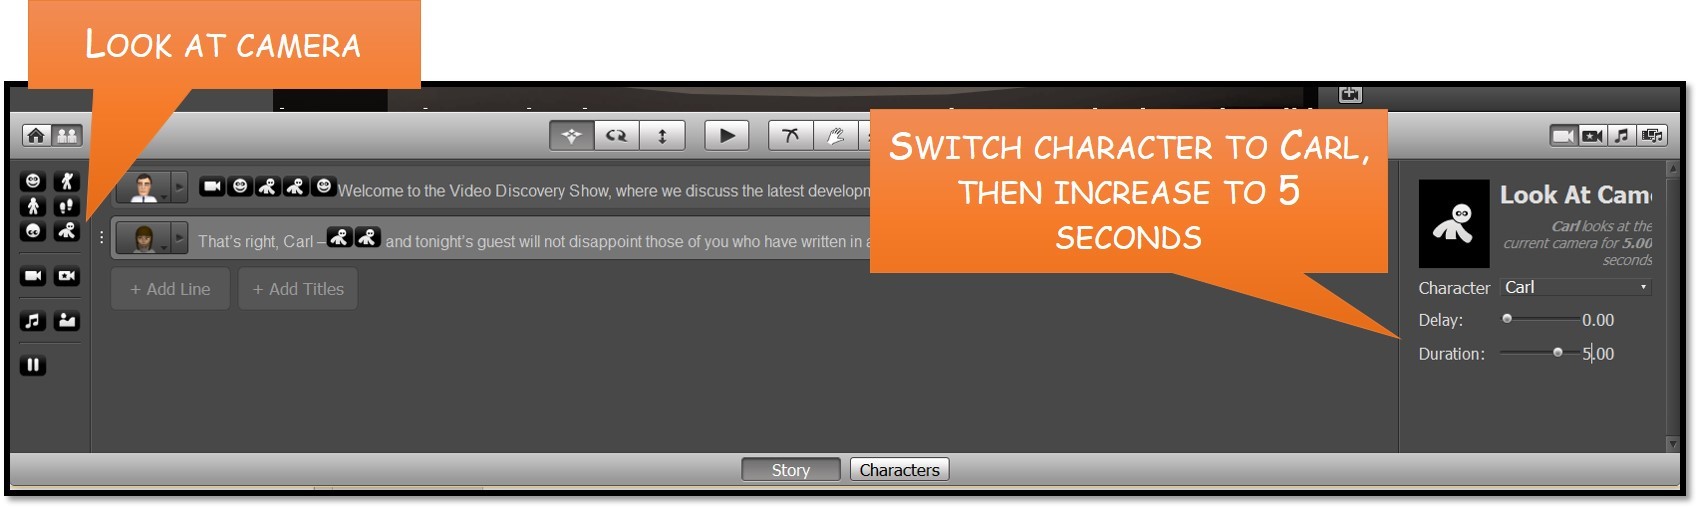
Click on Allison’s dialog. This time, click so that your cursor is just before —and tonight’s guest… Now click Look at Camera, and in the right hand pane, increase the Duration to 5 seconds.
Make sure Allison is the Character in the picklist.

Now click Look at Camera again, and this time select Carl as the character, and increase the Duration to 5 seconds. This will make Carl turn from looking at Allison to looking back at the camera again.
Gestures
Click inside Carl’s dialog so that your cursor appears just before the words —where we discuss… Now click Gestures.
Make sure Carl is the selection in the Character pulldown. In the Gestures pulldown, you can select different gestures and Carl will preview them for you, but for now scroll down to Thumb Up, and select it.
We want Allison to react to Carl – even if it’s only slightly. Click your cursor in Carl’s dialogue, just before the words latest developments… Click Gestures, and in the Gestures pane, change the Character to Allison. Now in the Gestures picklist, select Yes.

In Allison’s dialog, click so that your cursor is right before the words tonight’s guest… Click Gestures, and in the Gestures picklist, select Wonderful.
Now click Play – and see how a few clicks have improved your actors’ performance.
Recast a character
There will be times when you decide to recast your character. Nawmal makes this very simple. Let’s change Carl to another character. If the Cast pane is not showing, select Views>Cast, or click Cast on the middle toolbar.
Next to Carl’s thumbnail image, click Change. The Choose a new actor dialog appears. Scroll down to Gordon. Like in the first lesson, hover your mouse over the character, and click Install. Then select Gordon and click Ok.

Like magic, Carl disappears, and Gordon is now your male TV anchor. You can also change to a female character – just make sure you change the voice accordingly.

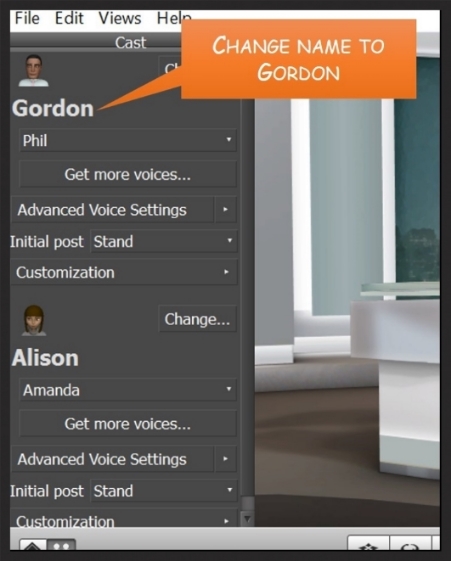
Also, it’ll help you to keep track of your anchor names to change the name to Gordon in the Cast pane. Simply highlight the word Carl, and rename to Gordon.
Adding Voice Over
Most animation programs on the market typically incorporate various text-to-speech features. And as you have learned, Nawmal has quite an extensive library of speech options, including language and dialect. Many animation programs even allow you to record human voiceover, which as you have probably seen, can take your movies to the next level. However, the biggest time-consuming aspect of adding voiceover to animation projects is the timing, especially lip-syncing.
Not with Nawmal. In fact, Nawmal is the only animation program in its class to automatically sync your characters’ lip movements with any voiceover – taking into account any speech fluctuations in speed, inflections, or dialect.
Let’s add a recorded voice to Carl’s first line of dialog. In this lesson, we have included a file called L2.MP3 for you to use. Save that file onto your computer.
Now click inside the first line of Carl’s dialog, and then click the small microphone button at the right end.

In the Voice Recording dialog box that appears, click Import, and then select the L2.MP3 file.

Now click Done and then click Play on the main screen so you see how Carl’s new dialog both looks and sounds. What do you think?
Export
If you want to show off your new skills and your video, maybe it’s time you share the video with your friends or co-workers.
Note: The ability to export your video is not available during the trial period.
Subscribed Nawmal users can export videos to a variety of shareable formats. First, be sure and save your file. Now select File>Export Movie. If you click Choose an output preset, you’ll see the various formats available. For this lesson, we will change the Aspect Ration to Standard AVI HD 720P. Leave all of the options set to the default. We do go over these formats and how/when to use each type in our Master Classes.
Nawmal will export the file. Depending on the length, this could take a few minutes. This one, however, is fairly short and should only take a few seconds to complete.
When the export has finished, the Play Movie button appears at the bottom of the dialog. Click the button if you want to preview your creation!
Conclusion
This was a pretty intense lesson – you learned quite a bit about adding a character and then adding dialog for the new “Co-anchor.” You also learned how to refine the performance of each of your characters and to communicate with the audience by adding a little body language and facial expression.
You also learned how to recast a character and export your creation to a short movie you’ll want to show off.
Make sure you save your Nawmal file – we will continue to use it throughout the next few days as we learn more. In the next lesson, we will learn how to add media. The TV set has several pre-determined areas for you to drop in any type of media – even PowerPoint presentations! Click on the following button to continue to lesson 3.